Home
›
Projects for Preschoolers
›
General Projects for Preschoolers
General Projects for Preschoolers and Toddlers
|
These General Projects for Preschoolers and Toddlers are appropriate
for children ages 2 - 6. They are projects that even the littlest of hands can do. |
When I create projects for preschoolers, I always make sure there is enough work for the preschooler to do so that they know the project is their own. I don't like doing projects that I do all the work and the child gets to look at it.
Every project here includes how-to instructions, a photo and a source for where you can buy the materials needed. Easy Peasy!
General Projects Table of Contents
Projects for Preschoolers:
Table Placemats
|
Supplies Needed:
|
|

Children:
Give a placemat to each child. Glue a photo of the child in the middle of the placemat. (Photos allow the children to identify their own placemat when they are not old enough to read names.) Decorate with stickers. Letter stickers or markers can be used to write their names on their placemat. Glue the placemat to the plain paper to make a sturdier placemat.
Adult:
Cut two pieces of clear contact paper at least 1" bigger than the placemat on all sides. Place decorated placemat on a flat surface. Remove the backing from the contact paper. Holding the contact paper at each end and over the top of your finished project, let the middle drop down to the placemat and guide to each end.
Use edging scissors or straight scissors to trim the contact paper to 1/4" edge. Placemats are washable with a wet cloth.
General Projects for Preschoolers:
Cupcake Liner Flower
|
Supplies Needed:
|
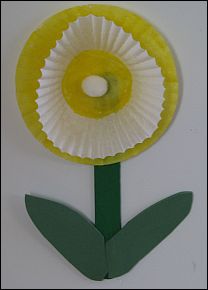
Directions:
Decorate the cupcake liners with watercolor paint or markers. Paint the
tongue depressor with the green tempera paint. Cut out two leaf shapes
from the green foam sheet.
To Assemble:
Flatten one cupcake liner completely. Fill the inner circle with Elmer's glue. Place the second cupcake liner on the first.
Using the hot glue gun, glue the cupcake liners to the top of the tongue depressor. Glue the pom pom into the center of the top cupcake liner. Glue the leaf shapes onto the bottom of the tongue depressor.
You can either glue a strip of magnet to the back of the flower for the refrigerator. Or make several flowers and place them in a small flower pot using floral foam to make them stand up.
Return to Top of General Projects for Preschoolers
General Projects for Preschoolers:
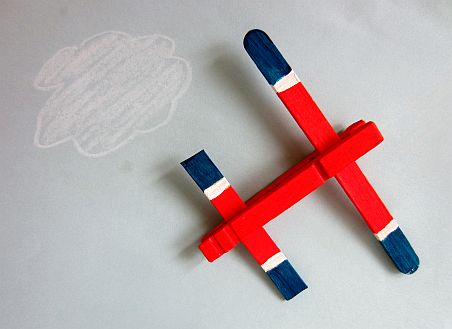
Clothespin Airplane
Directions:
Dismantle the spring-loaded clothespin and dispose of the spring. Cut the ends off one craft stick to make it a little shorter for the tail piece.
Paint the four wood pieces in any color and design desired. Lay the bottom of the spring-loaded clothespin down and touch with two drops of wood glue where you'd like to place the wings and tail. Touch with glue again and place the top of the clothespin on.
Let dry and let fly! (It really doesn't fly. The kids need to hold it in their hands and fly it.)
General Projects for Preschoolers:
Photo Puzzle

Supplies Needed:
- Craft Sticks
- Photo
- Modge Podge Acrylic Sealer
- Paint brush
- Exact-o knife
Directions:
Print a 4" x 6" photo that kids would enjoy.
Place craft sticks side-by-side to reach the size of the photo. For the younger kids, I used 6 large craft sticks and laid them horizontally. For the older kids, I used 14 small craft sticks laid vertically and trimmed the edge of the picture a bit.
Coat the back of the photo with Modge Podge and lay on the craft sticks, being careful not to separate the sticks. Let dry. After it has dried, use the exact-o knife to cut the sticks apart. Paint each stick (right over the top of the photo) with a layer of Modge Podge. Let dry.
Straw Rocket
 |
The reason this project keeps kids busy for a long time is not because of the time it takes to make, but it's playing with it after they make it that entertains them! Supplies:
|
Directions:
Print out the stencil. Cut out the pieces and let each child decorate the two pieces of their rocket.
Using scotch tape, tape up one side of the trigular piece. Loosely wrap the rectangular piece around the straw and use scotch tape to fasten together. To prevent moisture from the kids blowing into from ruining the rocket, wrap a piece of tape around the top and bottom of the rocket piece.
Place small pieces of double-stick tape inside the triangular piece and insert the other piece of the rocket.
Insert the straw into the rocket and blow hard up to the sky!
Return to Top of General Projects for Preschoolers
Want to look around some more?...
- Holiday Projects for Preschoolers
- Seasonal Projects for Preschoolers
- Craft Recipes
- Kids Coloring Sheets
 |
Marcia Reagan is the creator of DaycareAnswers and lives in Central Minnesota with her husband and two children. She's been an in-home daycare provider for over twenty years and loves to share her experience and passion for daycare with other providers. |


![]()
I have affiliate links. If you buy something through a link, I receive a small commission at no additional cost to you. That keeps this site free! To learn more, read my full Disclosure Policy. |


![]()