DaycareAnswers Home
›
Projects for Preschoolers
›
Spring Projects
Spring Projects for Preschoolers
|
What says Spring to you? For me, it's birds, flowers and bugs! These Spring Projects for Preschoolers were developed with the idea that even the youngest little hands could participate in making the project. |
Stained Glass Flower
Daycare Providers get teased about being addicted to laminating things. I don't own a laminator, but I'm addicted to clear contact paper. I use it for laminating daycare material and I used it for this project.
|
|
Supplies Needed:
|
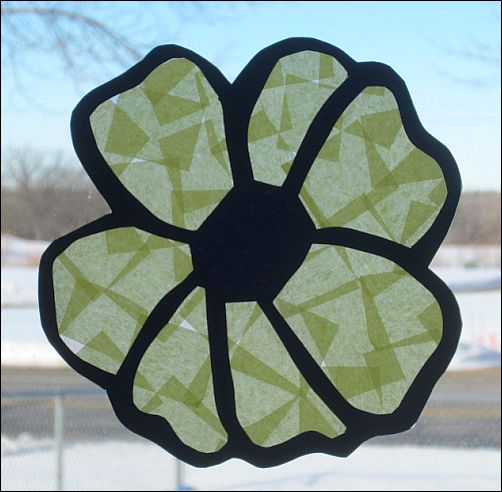
Print the Stained Glass Flower Template onto card stock paper. With scissors, cut out the individual flowers and then use the exacto knife to cut out the inner section of each petal. Use this template and a white pencil to trace the flowers onto black construction paper. Cut out the black flower outline like you did the stencil.
Return to Top of Spring Projects for Preschoolers
|
Supplies Needed:
|
|
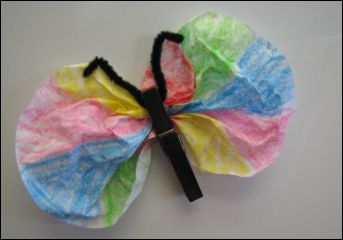
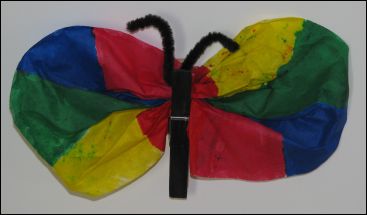
Have the kids decorate the coffee filter any way they'd like with the bright colored crayons or markers.
Color the clothespin with the black permanent marker, using the latex glove to cover the hand holding the clothespin to prevent messy fingers.
Lay the decorated coffee filter on a flat surface. Beginning in the middle, scrunch the coffee filter, pulling from top and bottom. Clip with the clothespin to form the butterfly's wings and body.
Cut a 4" piece of pipe cleaner and form a shape to represent the butterfly's antennae. Insert the antennae into the clothespin.
If you'd like the butterfly to be a refrigerator magnet, cut a 2-1/2" length of strip magnet. Cut the strip in half lengthwise. Attach the magnet to the back of the butterfly.
Return to Top of Spring Projects for Preschoolers
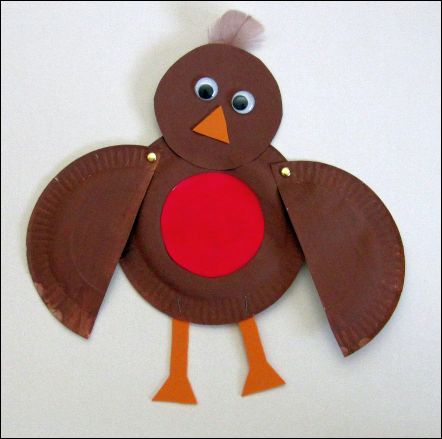
A Robin
(Spring Projects for Preschoolers)
The first sign of spring for me is when I see the robins in my yard digging for worms.
|
|
Supplies Needed:
|
Print the Robin Template and cut out the individual pieces. The large circle of the template is the robin's head. Paint this and the two 6" paper plates with brown tempera paint. After drying, cut one paper plate in half for the bird's wings.
Using the small circle on the template, trace the robin's breast onto card stock paper. Paint with red tempera paint. After it dries, glue the robins red breast onto the body. Use a book or heavy object to hold flat while drying.
Next use the triangle and the leg pieces of the stencils to cut out the beak and legs from orange art foam. Glue the beak and wiggle eyes to the head piece. Staple the legs to the body piece. Use the brass clips to connect the wings. I found a spare brown feather to glue to the top of the head!
Return to Top of Spring Projects for Preschoolers
Want to look around some more?...
- Easter Projects for Preschoolers
- Mothers Day Projects for Preschoolers
- General Projects for Preschoolers
 |
Marcia Reagan is the creator of DaycareAnswers and lives in Central Minnesota with her husband and two children. She's been an in-home daycare provider for over twenty years and loves to share her experience and passion for daycare with other providers. |


![]()
I have affiliate links. If you buy something through a link, I receive a small commission at no additional cost to you. That keeps this site free! To learn more, read my full Disclosure Policy. |