Coloring Easter eggs is so much fun. There are so many different ways to decorate eggs. It's inexpensive to do. And all ages can enjoy it.
Color Easter Eggs with Homemade Dye
There is no reason to purchase a dye kit for coloring Easter eggs. It's super easy to make your own Easter egg dye.
Ingredients:
- Boiled Eggs, See How to Boil an Egg
1 cup water
2 tablespoons white vinegar
20 drops food coloring
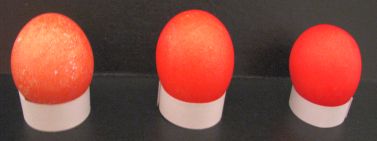
The intensity of the color will depend on how long you leave the egg soaking in your dye. The photo below demonstrates this point. The egg on the left was soaked for 10 minutes. The egg in the middle was soaked for 20 minutes. And the egg on the right was soaked for 30 minutes.
You can shine your egg by rubbing it with vegetable oil. Be careful not to use too much. It just takes a small amount on a paper towel, rub it lightly and let it dry.
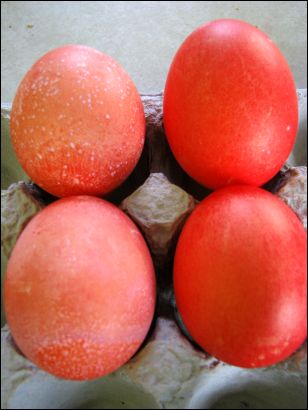
I had heard that the dye would adhere to the egg better if I added vinegar to the water while it was boiling, but the photo to the right shows the results. The two top eggs were boiled in just water and then soaked for ten minutes and twenty minutes. The two bottom eggs were boiled in vinegar water and then soaked for ten minutes and then twenty minutes. I, personally, can not tell a difference.
"Egg Head" Easter Eggs
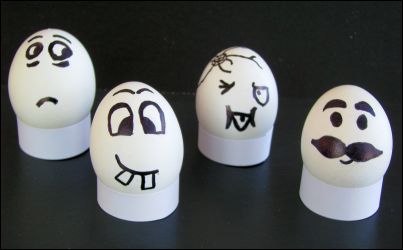
Any child who is old enough to draw eyes, a nose and a mouth can make Egg Head Easter Eggs. From a small child drawing a basic face to an adult getting creative, these Easter eggs can get really, really cute.
Supplies Needed:
-
Boiled Eggs, See How to Boil an Egg
Permanent Markers, any color
Directions:
Be creative and make funny faces on the boiled eggs!
Tip: If your boiled eggs are in the refrigerator, pull them out a few minutes before project time for best results.
Tissue Paper Easter Eggs
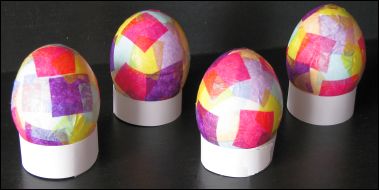
Tissue paper Easter eggs are easy for little hands to make. The "mess-factor" to decorate these eggs is very low and the eggs come out very colorful and shiny.
Supplies Needed:
-
Boiled eggs, See How to Boil an Egg
Tissue paper, various colors cut into small squares
Glue (add a couple drops of water for easy spreading)
Paint brush
Wet wash cloth for sticky fingers
Directions:
"Paint" a portion of the egg with glue. Place tissue paper squares into the glue and then paint the squares with glue again.
After about half the egg is "painted", let dry or fingers and egg will become too sticky. Finish the second half after egg is completely dry.
Tip: If your boiled eggs are in the refrigerator, pull them out a few minutes before project time for best results.
Note: Tissue Paper eggs are a little hard to peel when it comes time to eat them.
Rubberband Easter Eggs
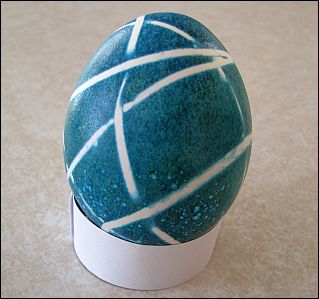
Placing rubberbands on your boiled egg and then placing it in the dye for the desired number of minutes gives your Easter Egg a very cool effect.
You can even dye the egg one color, then place rubberbands on the egg and place the egg in a different color to see the different outcomes you can get.
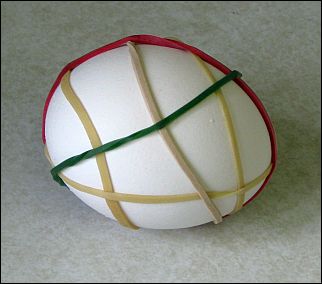
Note: It can be a little difficult to get the rubberbands to stay on the egg. The secret is to use bands with a little width to them and shorter in length.
Speckled Easter Eggs
There are a couple of ways to get a speckled effect on your Easter Eggs.
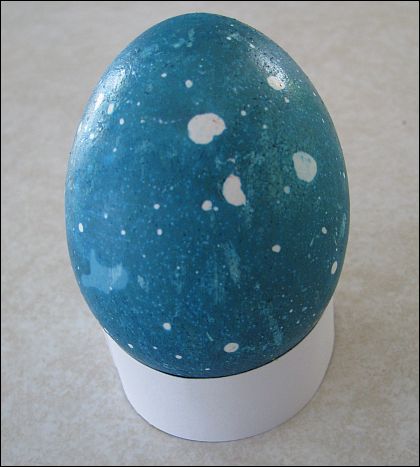
The first way is to add two tablespoons of vegetable oil to your homemade dye recipe and place the egg in the dye for the desired number of minutes. The vegetable oil works against the water and gives the egg a speckled look.
The second way to get a speckled egg is using a toothbrush to "splash" the speckles onto the egg. Dip the toothbrush into the desired colored dye, hold the toothbrush over the egg and run your fingers along the bristles.
Painted Easter Eggs
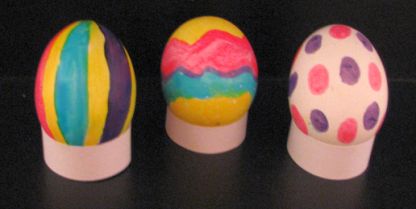
These eggs were painted with undiluted food coloring and a Q-tip. As you can see, this method gives you very bright colors and it's easy to do. You'll have to paint one color at a time and let them dry in between each color you use.
And remember, whenever you are coloring Easter eggs, you want to set up some type of splash guard to protect your work area.
Want to Look Around Some More?...
Exit Coloring Easter Eggs and Return to Easter Time for Kids
| Contact Us | Site Map | Privacy Policy | About Me |
 |
Marcia Reagan is the creator of DaycareAnswers and lives in Central Minnesota with her husband and two children. She's been an in-home daycare provider for over twenty years and loves to share her experience and passion for daycare with other providers. |


