DaycareAnswers Home
›
Projects for Preschoolers
›
Summer Projects
Summer Projects for Preschoolers
These projects are perfect for little hands. They've been tested in my own daycare, but they're perfect for in the home too.
Hairy Potter
Summer Projects for Preschoolers
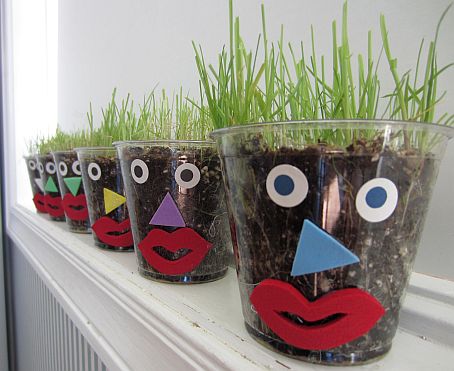
These planters are so much fun. Rye grass grows easily and fast. The kids have to "cut Hairy's hair" every couple of days. They love it!
|
Supplies Needed:
|
|
Attach the eyes, nose and mouth to the clear plastic cup using a strong craft glue.
Fill the cups 3/4 full of potting soil. Sprinkle the rye grass seed on. Then fill the rest of the cup with more potting soil.
As the grass seed starts to grow, it becomes "hair". Let the kids water "Hairy" every day and then cut the hair with small safety scissors every time it grows long.
Supplies You May Need:
|
|
|
Sunglasses
Summer Projects for Preschoolers
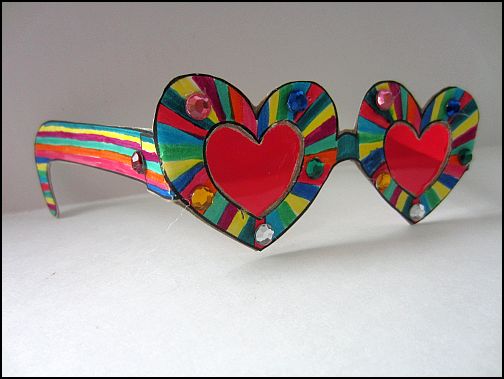
I saw homemade sunglasses on Pinterest and then I took it to the next level! The kids were adorable in their glasses.
|
Supplies Needed:
|
|
I went to the Picklebums website and printed out four of the different sunglasses template. I let each child pick which shaped glasses they would like and then I printed them at a reduced 85% because I felt the glasses would be too big for my kids.
Each child can color the glasses with markers. I encouraged them to be a little crazy while they were decorating.
I cut the glasses out and then cut cardboard pieces of the exact same sizes. Use the exact-o knife to cut the lens section out. Using that cut out piece, cut the shape a little larger from the plastic sheet to create a lens.
I stapled the cardboard bows to the frames and then had the kids use Elmer's glue to glue the lens down first and then glue their decorated glasses on to the cardboard.
Once dry, I used the hot glue gun and placed small dabs of glue for the kids to place their gems where they desired.
Supplies You May Need:
|
|
|
Egg Carton School Bus
Summer Projects for Preschoolers
A great project to make with the kids right before the new school year starts. It works for the both the school-aged kids and the preschoolers.
|
Supplies Needed:
|
|
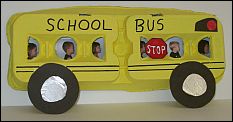
Paint the egg carton yellow. (It takes three coats, so I had the kids do two coats and I did the third coat for everyone.)
The tires are made with black construction paper and tinfoil. I took a small juice glass to trace two circles for the tires. I then used those black circles as a stencil on the tinfoil. After cutting the tinfoil to match the tire, I cut it smaller to fit inside the tire. I then glued the foil onto the black construction paper tires.
Use the black sharpie to detail the school bus.
For the stop sign, I Googled an octagon shape and printed out as a 1-1/2" x 1-1/2" shape. I penciled in the letters and then filled in the sign with a red sharpie. Glue the stop sign onto the school bus.
To make the flashing light, cut the black shape from construction paper. Cut a circle out of white paper and color it with your red sharpie. Glue it to the front of the bus.
Print the kids pictures out on regular copy paper. Cut a strip of cardstock paper to fit the underside of the egg carton. With a pencil, mark where you want photos placed. Glue the photos in the appropriate positions and then glue the cardstock strip to the bottom side of the egg carton. (If you don't want to print photos, you can hand draw heads with faces to fill the bus windows.)
**This project idea was given to me by Kerry from Playful Garden Daycare. Visit her Facebook Fan Page for lots more fun craft projects to do with your kids!**
Baggie Butterfly
Summer Projects for Preschoolers
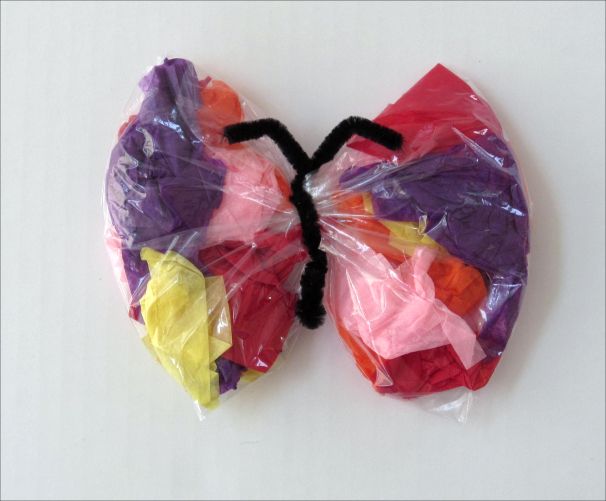
Cut the various colors of tissue paper into squares approximately 3" x 3".
Have the kids crumple the tissue paper and place inside the baggies. Fold 'n close the baggie. Flatten to remove all the air and seal with scotch tape.
Cut Chenille stems into 7" lengths. Fold the stem in half. Twist a couple of times at the fold to form the butterflies body. Gather the baggie in the center and place inside the Chenille stem. Twist the stem again to secure the baggie. Bend the remaining stem to form the butterfly's antennae.
Coffee Filter Fan
Summer Projects for Preschoolers
|
|
Supplies Needed:
|
Paint the coffee filter with water color paint. Let dry.
Fold the coffee filter in half and cut a half moon shape out of the middle. (Use the line where the bottom of the filter and the fluted side meet as your guide where to cut.)
Use the hot glue gun to glue the popsicle sticks into the fan shape. The span of the wide end should be 6 inches. Open the coffee filter and spread Mod Podge on one half of the inside. Place the popsicle sticks inside so that the small end forms the handle of the fan. The wide end will be all the way to the top edge of the coffee filter. Let dry.
Use a sharpie to decorate the fan with flowers, symbols or anything desired. Paint one side of the fan with Mod Podge. Let dry. Paint the second side of the fan with Mod Podge. Let dry.
Bee Hive
Summer Projects for Preschoolers
|
Supplies Needed:
|
|
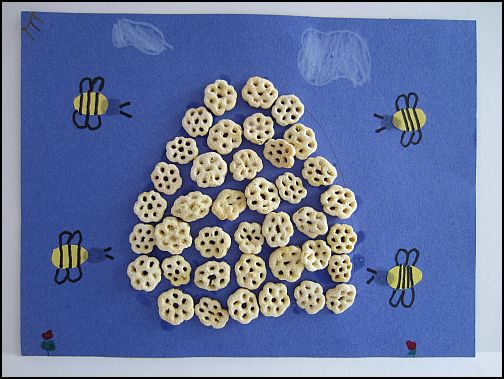
Draw an outline shape of a bee hive on the blue construction paper. Dip each Honeycomb cereal piece in the Elmer's Glue and attach to the beehive outline.
Make the bees by cutting a yellow piece of construction paper for the body, black fingerprints for the head, and use the Sharpie for wings and antennae.
Optional: Give the kids markers, crayons or colored pencils to draw in more scenery such as clouds, a sun, flowers, etc.
Return to Top of Summer Projects for Preschoolers
Want to look around some more?...
- Preschool Father's Day Crafts
- General Projects for Preschoolers
- Kids Coloring Sheets
- Outdoor Activities for Preschoolers
 |
Marcia Reagan is the creator of DaycareAnswers and lives in Central Minnesota with her husband and two children. She's been an in-home daycare provider for over twenty years and loves to share her experience and passion for daycare with other providers. |
